...
- In the left pane of the application you created, click Single sign-on to open the Single sign-on pane for editing.
- Choose the SAML option to open the SAML-based Sign-On page.

- In the Set Up Single Sign-On with SAML section, complete the applicable steps. For information, click configuration guide on the Azure portal for more information.

- In step 1, the Basic SAML Configuration section, click Edit and complete the following:
- Identifier (Entity ID): Enter the Audience URI that you copied when generating the audience keys.
- Reply URL (Assertion Consumer Service URL): Enter the HUB ACS URL that you copied when generating the audience keys.
Sign on URL: Enter the same value that you used in the Reply URL (Assertion Consumer Service URL) field.
The subjectNameID in the SAML assertion must be the user’s email address, and the email address must have a domain name that matches the domain for which the federation is being configured.
- In step 2, the User attributes and claims section, click Edit.
- In the User Attributes & Claims dialog, click Add a group claim, as shown below:

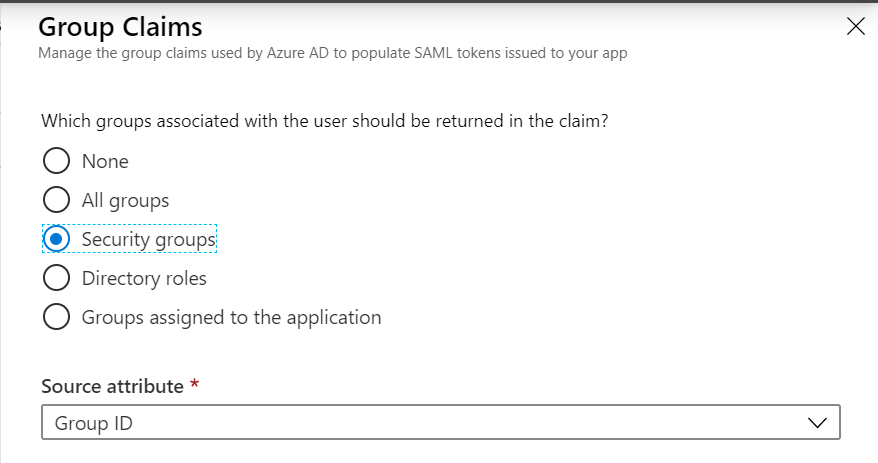
- In the Group Claims dialog, complete the following to configure groups that should be included in the token:
- Which groups associated with the user should be returned in the claim: Select Security groups.
- Source attribute: Choose Group ID from the drop-down menu.
- In the Advanced options section, select the Customize the name of the group claim check box.
- Name (required): Enter groups.
- Click Save.
- In step 3, the SAML Signing Certificate section:
- Download the Certificate(Base64) and save it for later.
- In section 4: Set up "<your application>," section:
- Copy the Login URI and Azure AD Identifier and save them for later.
...